
Ceiling Beam Assembly with P-System
How It works Lay out center lines for connectors on facias and soffit Set Zeta P2 to “14” for the P-14 connectors Set flip stop to desired angle and use the spacer plate if necessary. *Or use stop square for long point referencing Machine P-System slots Using drill jig, drill 6mm wrench access hole for…
Read More
Dividing Panel Joints From 19mm with Tenso P-14
Would you like to connect dividing panel joints invisibly to one another? The offset installation of the Tenso P-14 allows glued joints from a material thickness of <br />19mm to be realised in almost no time. Use a template with uniform spacing instead of marking repeatedly. Clamp the template on the dividing panel as a…
Read More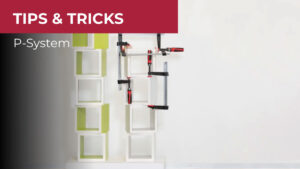
Gluing Made Easy Thanks to Tenso P
1. Cut all components. 2. Slide in the connectors. 3. Apply glue. 4. Press in the preload-clip to make it easier to join the components. 5. Assemble the components. 6. Ready-glued carcase without waiting times and without any clamps or adhesive tape.
Read More
Hybrid Zeta P2 + CNC Positioning Pin Method
Precise drilling on a CNC machine, use these drill holes to position the Zeta P2 to cut theP-System grooves. This application is especially ideal if the CNC machine is a nesting machineand or no aggregate is available. This method combines the precision and efficiency of aCNC machine and uses the simple and fast machining of…
Read More
Clamping Miters in Thick Material
Mark the connector position and cut the profile groove with the Zeta P2 For the offset groove: Slide on the stop square and set the position Check the cutting position with the machine to prevent cutting through Place the Zeta P2 with the stop square on the outer face and cut the offset grooves Drill…
Read More
Great combination of CNC machines and Zeta P2 and Zeta P2 Cordless
How it works: P-System Groove in Surface Position of drill holes, ø 5 mm / ø 8 mm Drill positioning holes with a CNC, ø 5 mm / ø 8 mm Insert the positioning pins into the Zeta P2 Position the machine in the holes How it works: P-System Groove in Edge Drill positioning holes…
Read More